Wednesday, July 3, 2019

July ABC challenge: Mixed berry ginger crumb cake


Taking advantage of the season's abundance of fresh berries with this cake.  I cut the recipe in half and then made a few minor adjustments.

Here's what I used:

2.5 ounces raspberries  
2.5 ounces blackberries
2.5 ounces blueberries  
1/4 cup 3 tablespoons granulated sugar
1 tablespoon brandy (can substitute vanilla extract or perhaps orange blossom water)
 

For the Crumb Topping:
5 tablespoons light brown sugar 

2 tablespoons all-purpose flour 
2 tablespoons finely diced candied ginger 
2 tablespoons unsalted butter (at room temperature, cut into small cubes)

For the Cake: 

3/4 cup all-purpose flour  
1/4 cup cornmeal 
1/4 cup 3 tablespoons granulated sugar 
1 teaspoon baking powder  
1/2 teaspoon ground ginger 
1/2 teaspoon fine sea salt 
3 tablespoons unsalted butter (at cool room temperature, cut into small cubes) 
1/3 cup whole milk 
1 egg

Preheat oven to 375 degrees F. Grease a 9 x 4.5-inch loaf pan, a 7" round cake pan, or 1
¼-quart baking dish.  In a bowl, toss the berries with the sugar and brandy; set aside.  In another bowl, whisk together the brown sugar and flour, then stir in the crystallized ginger. Blend the butter into the mixture with your fingertips or a fork until crumbs form. Place the bowl in the freezer while you prepare the cake. In a medium bowl, whisk together the flour, cornmeal, sugar, baking powder, ground ginger and salt. Add the butter pieces and, using your fingertips or a pastry blender, work into the flour mixture until it is completely incorporated and there are no pieces larger than a pea remaining.  In a measuring cup, whisk together the milk and egg, then add to the flour mixture. Using a rubber spatula, gently stir the batter together until no pockets of dry ingredients remain. Spread the batter in an even layer in the prepared pan. Using a slotted spoon, remove the berries from the bowl and scatter over the cake batter. Break up the crumb topping into large pieces and scatter over the berries.  Bake until the berries are bubbling and the cake is firm, 40 to 45 minutes. Place the pan on a wire rack and cool for at least 30 minutes before serving. The cake can be stored, covered, at room temperature, for up to 2 days.


I used the 7" cake pan, and it was completely filled once the cake baked.  It was hard to tell when it was done, as no cake rose through the berry and crumb topping and it all seemed so wet.  I ended up baking it for 45 minutes, but it seemed okay, although for a small cake that seems like it should have been too long.  The cake was dense, but I think it was supposed to be that way in order to hold up to all that topping.  The crumb topping was quite sweet even with reduced sugar, so I didn't use all of it, although as it turns out I could have.  In the end the cake was only lightly sweet.  It would be great for brunch or a light dessert, but maybe not for breakfast. I think it would also be good with a thin egg custard.  I don't know what role the brandy plays.  I don't think there's any flavor left after all that baking--- certainly not any alcohol--- and it just created more liquid that doesn't get used. 

Conclusion:  Very tasty.  It had an unusual flavor that I couldn't quite pin down, but have to assume it was from the ginger (unless it was the brandy, but I doubt it.)  It seemed to only perfume the cake rather than actually flavor it, it was so subtle.  (Which gives me the idea of using a little orange blossom water in with the berries.)  The cornmeal gave the cake a little more bite, which I liked.  But with three types of berries and three separate concoctions, I'm not sure it's something I'd make again.  It's not "special" enough to go through that trouble. 

Recipe:  Mixed Berry Ginger Crumb Cake via Brown-Eyed Baker


Monday, June 3, 2019

June ABC challenge: Oatmeal Peanut Butter Chocolate Chip Scones


Damn trying to bake on a warm evening.  I was trying to make these for a bake sale fund raiser, so I hope they turn out, but although my butter started out frozen, by the time I was mixing in the chocolate chips it had melted.  I also had to use a buttermilk substitute; I was a little concerned when it didn't seem to change consistency, but I suppose all I needed was the acid.  We'll see how it goes.

Since I was using unsalted natural peanut butter, I increased the salt in the recipe.  I figured in this particular recipe, better a little more salty than not enough.  I added extra peanuts as well, but didn't measure them.

My changes are in strikeout and italics.  Here's what I used:

2 cups all-purpose flour
1 cup traditional rolled oats
⅓ cup dark brown sugar
1 teaspoon baking powder
1 teaspoon baking soda
¼ ¾ teaspoon salt
6 tablespoons cold unsalted butter, cut into small pieces
¾ cup buttermilk
1 tablespoon white vinegar
1 egg (separated)
½ cup chunky peanut butter
crushed peanuts
1 cup semisweet chocolate chips
raw sugar (for sprinkling)

Preheat oven to 400 degrees F.  In a large bowl, whisk together the flour, oats, brown sugar, baking powder, baking soda and salt.  Add the butter and use a pastry blender to cut the butter into the flour mixture until the butter is pea-size (alternately, you could use your fingertips to rub the butter into the flour mixture).  In a small bowl, whisk together the buttermilk and the egg yolk. Make a well in the flour mixture and pour the buttermilk mixture into the center of the well, then add the peanut butter. Using a rubber spatula, very gently fold the mixture together until it starts to come together.  Add the chocolate chips and gently knead with your hands (in the bowl) until just incorporated. Be careful not to overmix the dough. Turn the dough out onto a sheet of parchment paper on a cutting board and pat it into a round disk about 8 inches in diameter. Whisk the egg white, then brush the top of the dough with the egg white, and sprinkle with raw sugar.  Cut the dough into 8-12 wedges (do not separate them), slide onto a baking sheet, and bake for 18 to 22 minutes, or until the scones are golden brown and a toothpick inserted in the center comes out clean or with just a few crumbs attached. Remove from the oven and let cool for 5 minutes, then re-slice and separate them. Transfer to a wire rack to cool completely, or serve slightly warm.

The dough was so soft and sticky, I shaped it and then stuck it in the freezer for about 15 minutes.  It firmed the dough, but I doubt it had any affect on the butter chunks (or smears, as they were.)  Otherwise, these were pretty easy and quick to pull together.

I baked the scones for the minimum amount of time.  The dough was well colored, but the interior was still very soft.  They also spread and rose a fair amount, such that the scones (cut into eights) ended up fairly large.  I recommend cutting them into 9-12 segments.

Conclusion:  I'm not big on scones--- I think it's mostly a textural thing.  They're not quite biscuits, which are nicely short, and not quite cake, soft and moist.  These didn't change my mind.  I don't think the flavors were well suited to scones, the texture was a bit dense (personally I think they could have used another minute or two in the oven, but then they might have been dry), and the oatmeal didn't soften, resulting in what felt like bits of paper.  But a scone lover probably would have found them delicious.  I might try using the basis of this recipe, though, with other flavors (minus the peanut butter and oats) as it baked up really nicely.

Recipe:  Oatmeal Peanut Butter Chocolate Chip Scones via Brown Eyed Baker

Thursday, March 14, 2019

Happy Pi Day! Colonial Innkeeper's Pie


I never plan ahead properly, so every year for Pi Day I find myself looking for something easy that I can put together quickly. But those aren't the kind of pies I usually want to eat. 


I've had this recipe for "Funny Cake Pie" bookmarked for some time. It's an odd recipe, from an odd (now defunct) blog. I'll let that blogger explain...
This month’s pie is a traditional pie of the Pennsylvania Dutch.  Supposedly the pie, like the community of settlers from which it comes, is German in ancestry, but I am a bit skeptical of this claim, since I’ve never run across anything like this in German bakeries.  In fact, pies in general are little known by traditional German bakers.... The name “Funny Cake Pie” is telling in several ways. First of all,  the pie itself is cake-like, much like a shoo-fly pie, or a lemon sponge pie, or a Montgomery pie.  There is a cakey layer component to the filling.  The “funny” bit refers to the way the chocolate layer goes on top when you make the filling but it comes out of the oven with the chocolate layer mysteriously on the bottom layer!


Old recipes were written very differently from how they are now with far fewer directions that are often quite vague, so I'm usually hesitant to try them.  I think this blogger actually made the pies on her blog, but she doesn't have a clue how to write a recipe.  I've rewritten it below and tweaked the recipe a bit in order to, I think, give better flavor.  Here's what I used:

9" unbaked pie crust

Vanilla mixture:
1 cup flour
1 teaspoon baking powder
1/4 cup salted butter, softened
1 cup sugar
1 beaten egg
1/2
teaspoon vanilla
1/4
teaspoon almond extract
1/2 cup milk

Sift together the flour and baking powder; set aside. In a medium-sized bowl, cream together butter and sugar until fluffy. Add the egg and beat until smooth. Add the vanilla and almond extracts and beat until well mixed. Beat in the milk alternately with flour mixture until smooth; set aside.

Chocolate mixture:
1/4 cup cocoa powder
1/2 cup sugar
1/2 teaspoon espresso powder (optional)
1/8 teaspoon salt
6 tablespoons water
1/4 teaspoon vanilla

In a small bowl, stir together the cocoa powder, sugar, espresso powder, and salt. Add the water a little at a time and blend to combine. Add the vanilla and stir to mix well. Pour into an unbaked pie shell. Over this carefully pour the vanilla mixture. (It’s okay if the chocolate oozes up around the outside edge---it gives a nice crusty edge on the finished product.) Bake in a 350 degree oven for 35-45 minutes or until toothpick in the center comes out clean. Allow to cool before slicing.

This didn't turn out quite as she described. I'm not sure if that's because she made a mistake in posting the recipe, or if the recipe was simply bad to start with. (When I was a little girl, my mom and I made a shoofly pie from a recipe in the back of a book I'd read. It was a disaster. We even made it a second time---bless my mom's heart--- to see if we'd made a mistake the first time and got the same results: a watery molasses mixture that never even began to set up. Wish I could find that recipe now to take a look at it.  Apparently it's supposed to have a "cakey" part as well.) The chocolate batter was watery and the vanilla batter very thick, so yes, the chocolate mixture did ooze a bit, but it came out of the oven exactly as it went in, just no longer raw. Nothing mysteriously changed places or did anything else unusual, other than it took at least 10 minutes longer to bake than instructed. At least it did set up. I was worried I would end up with another shoofly disaster.

I've never heard of Montgomery pie, so I looked it up and I found that this recipe is very similar, but substitutes the molasses flavor for chocolate.  The chocolate option seems to be called Colonial Innkeeper's pie.  I also noticed that one person baked her pie for 45 minutes at 375 and it still was underbaked.  (Most significantly, she used an egg in each part.  I don't actually know what made the chocolate part in this set.) 

Conclusion:   My co-workers seemed to like this but I didn’t care for it. It tasted commercial, partially because of the poor quality cocoa and partially because it was too sweet. (Other recipes use ¼ cup less sugar, I think.) The texture was gummy even though it was baked, and the flavor was sort of bland. And I don’t know why you’d bake a cake in a pie anyway. But it was a fun experiment.

Original recipe: Funny Cake Pie via Pie of the Month Club 
Another recipe to try:  Colonial Innkeeper's Pie via allrecipes


Sunday, March 3, 2019

Breakfast cookie

Monday morning meeting tomorrow, so I made snacks.  These are supposed to be healthy cookies, suitable for breakfast, fortified with lots of granola-y stuff.

The author of this recipe is a food scientist, but that doesn't mean she's a good baker, or a good blogger.  She didn't say how many this made, or even how big they're supposed to be. (What's a 1.5-ounce ice cream scoop??)  I suppose I should have checked her photos again before making them, but it still didn't help that I didn't have the scoop.  And she cheated by putting her almonds on top before baking instead of mixing them in, making the cookies look a lot chunkier than they are.

Hers
I mostly used the original recipe directly and made one dozen cookies, with just a few change ups.  Here's what I used:

1 cup all purpose flour
¼ cup whole wheat flour
¾ cup old-fashioned large flake rolled oats
1 teaspoon cinnamon
1 teaspoon turmeric
1/2 teaspoon baking soda
1/2 teaspoon baking powder
1/4 teaspoon salt
6 tablespoons unsalted butter, room temperature
¾ cup packed light brown sugar
1 tablespoon molasses
2 ½ tablespoons golden honey
zest of ½ orange (optional)
1 large egg, room temperature
1 teaspoon vanilla
2 tablespoons flax seeds
1/2 cup whole almonds or walnuts, toasted
1/3 cup sunflower seeds, toasted
(1/4 cup golden raisins)
1/4 cup dried cranberries
Preheat your oven to 350F.  Lightly grease two baking sheets and set aside.  In a medium bowl, whisk together the first eight (dry) ingredients.  In a large bowl, beat together on high speed butter, sugar, honey, and orange zest until smooth and creamy, about 1 minute.  Beat in egg, vanilla, and flax seeds until smooth. Add flour mixture all at once to the butter mixture and beat on low speed until it is mostly combined, about 10 to 15 seconds.  Use a rubber spatula to fold in nuts, seeds, and fruit all at once. Use a tablespoon (or a 1½-ounce ice cream scoop) to drop large, plum-sized scoops of dough onto the prepared baking sheets, spacing them 2 inches apart.  Flatten each cookie slightly; bake until golden brown around edges, about *10-12 minutes. Let cool on the pan for about 1 minute before transferring them to a wire rack to cool.


Well these weren't quite what I had in mind. I was picturing something far more chunky and less dessert-like. These were WAY too sweet for a breakfast cookie, and not nearly chunky enough. They need more whole wheat flour, about ½ cup less sugar and at least half again as many nuts and maybe sunflower seeds, if not double. (I'd play around with the balance between sugar, honey, and raisins.) I’d probably leave out the raisins entirely and replace with more cranberries.  (I couldn't even taste the cranberries.)  At one time her recipe said it made 16 cookies; I made one dozen and had to bake them about an extra 5 minutes.

Conclusion:  Meh.  I probably wouldn't make these again unless I needed something quick and easy to bring to another meeting.  I wish I'd thought of it sooner, but coffee flour might have been a good addition.

Recipe:  The Breakfast Club Cookie via Scientifically Sweet

Monday, February 18, 2019

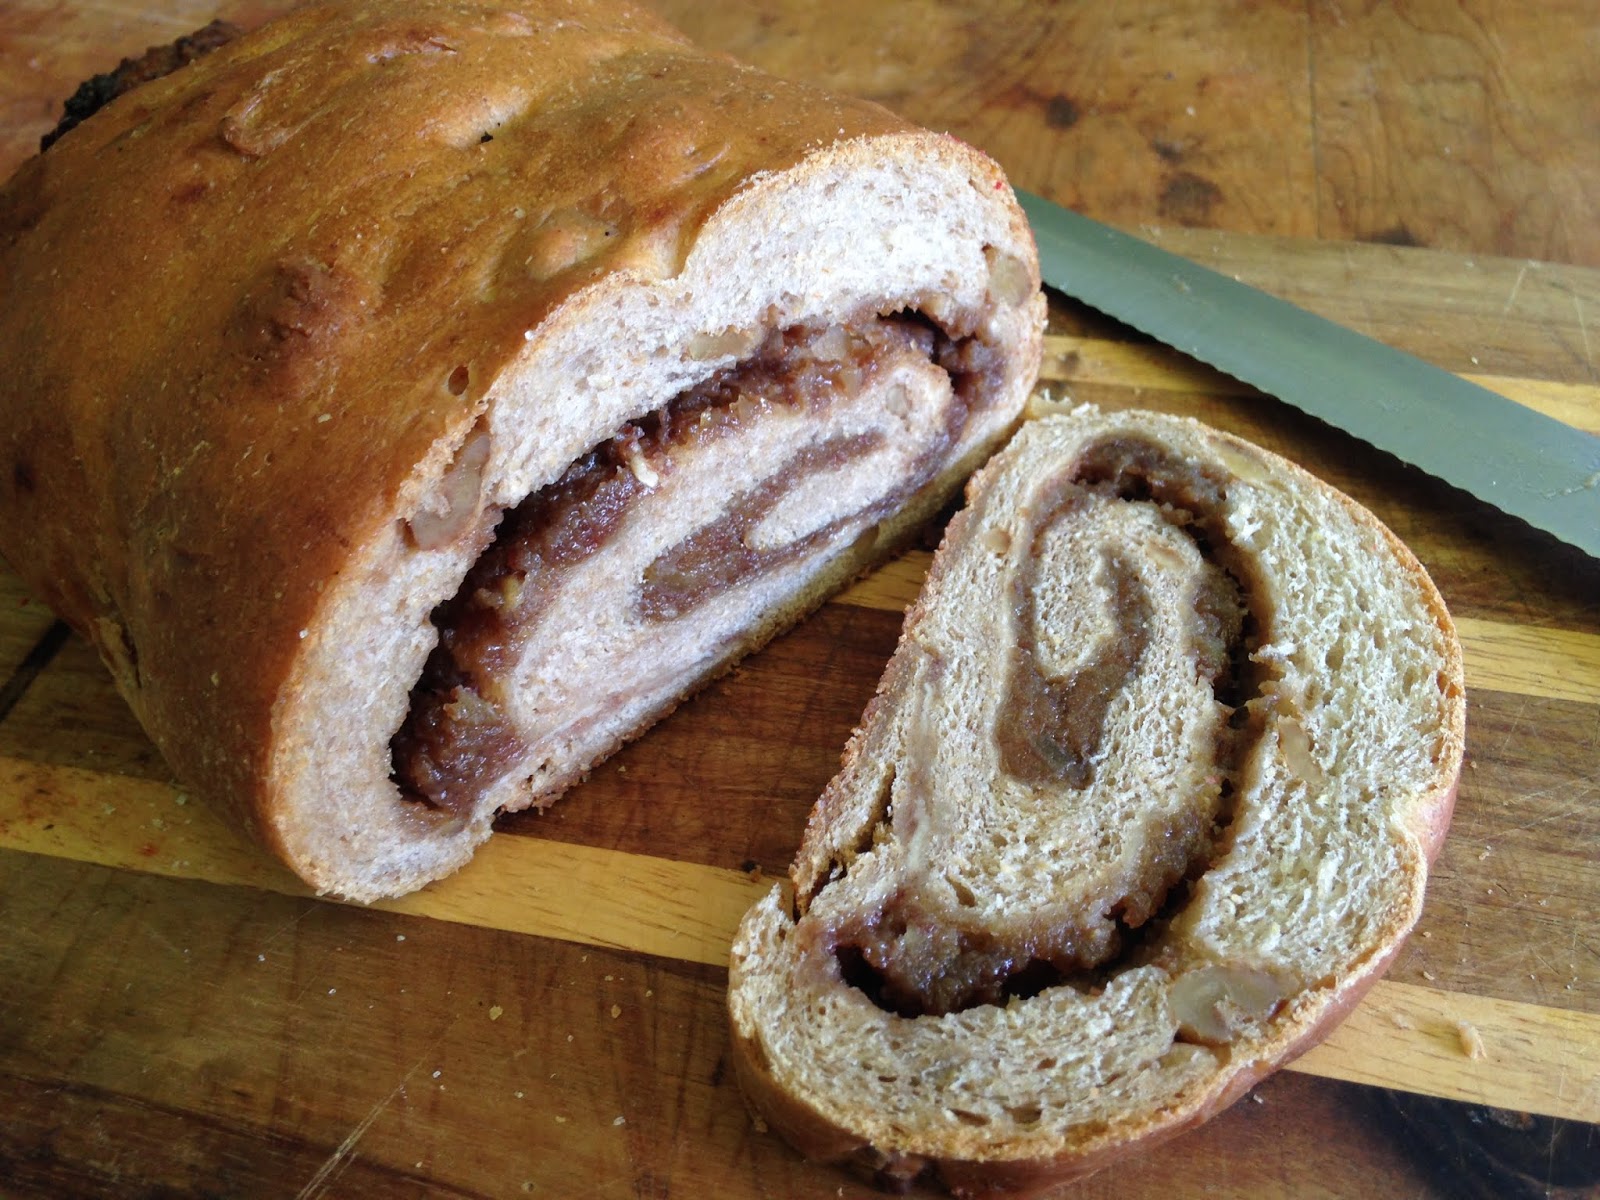
February ABC challenge: mini Brie, date, and walnut bread

This is our first challenge from this year's source, Brown Eyed Baker. (We skipped January, although I did make her Morning Buns last month, because I LOVE THEM.) I'm afraid I've changed it up so much that it doesn't much resemble the original. The idea of going through all the trouble of making a cheese-swirled yeast bread when I could get essentially the same thing, albeit not as fancy, by melting a few slices on a piece of white didn't excite me. I could have replaced the filling with any number of things, but I tried to stay within the "savory" category as much as I could while still being intrigued by the bake.
I discovered the decadent combination of dates and this incredibly rich, buttery (and expensive) Saint-André triple-cream Brie cheese several years ago and decided to try working that into the bread. I also added walnuts for texture and flavor, as well as using half whole wheat flour.

The original recipe makes 2 large loaves, which I scaled back to one-quarter of the original.  This is what I used:

1/4 cup lukewarm water 
56g (1/4 cup + 1½ teaspoons) lukewarm milk(65g)
1 Tablespoon honey (or 1 Tablespoon + 3/4 teaspoon granulated sugar)
1 teaspoons (3.5g) instant yeast
198g flour (¾ cup AP, ¾ whole wheat, 1 Tablespoon high gluten) (209g)
1/2 teaspoon salt
1 Tablespoon vegetable oil
1/4 cup walnuts, coarsely chopped
3/4 cup (140g) dates, chopped and softened in 3 Tablespoons warm water
1/2 teaspoon ground ginger (optional)
4 ounces (113g) triple-cream Brie cheese, thinly sliced
1¾ cups (7oz/198g) diced onion (about 1 medium onion) or 1 small bunch of fresh chives (1 oz/28.5g), minced
2½ cups (12 oz/340g) grated, shredded, or cubed cheese


Combine the water, milk, and honey (which is what I used) and whisk in the yeast until dissolved; allow to proof.  In a mixing bowl, whisk together the flour and salt (and sugar, if using.)  When proofed, add the yeast mixture, along with the vegetable oil, into the dry ingredients.  If using a mixer, use the paddle (or hook) attachment and mix on the lowest speed for 2 minutes. If mixing by hand, use a large spoon and stir for about 2 minutes. Let the dough rest for 5 minutes. 

Switch to the dough hook and mix on medium-low speed, or continue mixing by hand, for 3 minutes, adjusting with flour or liquid as needed. The dough should be soft, supple, and tacky but not sticky.  Transfer the dough to a lightly floured work surface.  Work in the walnuts, then knead for 1 or 2 minutes until they're evenly distributed.  Form into a ball and place in a clean, lightly oiled bowl; cover the bowl with plastic wrap, and immediately refrigerate overnight for up to 4 days.  The dough should double in size in the refrigerator.  (If you want to bake the bread the same day, just let it rest at room temperature for 60 to 90 minutes, until it doubles in size.)   


When you're ready to shape the dough, pour off and reserve any excess water from the dates, then puree, along with the ginger, to a thick but spreadable paste, adding reserved water if necessary; set aside.  Bring the dough to room temperature before shaping.  Transfer to a lightly floured work surface, dust with flour, and roll into a rectangle about 4 inches wide and 16 inches long.  (See thoughts on size.)  Spread the date paste over the surface, weighing it more heavily on the outside end of the strip and leaving about an inch on the outside end bare.


Lay the cheese slices in a staggered formation on top, also weighing them more heavily on the outside end of the strip, then roll it up to form a log. (It should be as tight as you can get it without squeezing out the filling.)  If any cheese or walnuts fall out, tuck them back in.  Pinch the seam to seal.  


Place in either a greased pan or on a greased cookie sheet and cover loosely with plastic wrap, then let rise at room temperature for about 90 minutes, until increased to about 1½ times its original size. 


About 15 minutes before baking, preheat the oven to 350°F (177°C), or 300°F (149°C) for a convection oven. Because of the cheese, there may be air pockets or tunnels in the risen dough that could cause it to separate in the spirals. To minimize this, poke through the top crust in a few spots with a skewer or toothpick. The dough may fall a bit, but it will recover in the oven. Bake for about 35 minutes. The bread is done when it's a deep golden brown and the internal temperature is about 185°F (85°C) in the center. Remove from the pan or sheet and cool completely on a wire rack before slicing.


I was a little afraid that this was going to be an expensive disaster, but it turned out well!  I was disappointed in the shape; I think perhaps I didn't allow it to rise long enough before baking.  Consequently the outside hardened, leaving the inside nowhere to go but out the sides.  I also think the size was unwieldy.  I based it on this Cranberry Cinnamon Swirl Bread, but the filling for this recipe was much bulkier and it didn't roll up as nicely.  Next time I might roll the dough out to 5 x 12 or 5 x 14.   

Conclusion:  This had a curiously "dark"---perhaps earthy---flavor to it that I couldn't quite pin down...  sort of  anti-umami.  I think it was the combination of the pungent cheese and the dates and the whole wheat.  Unusual, but very tasty.  I was trying to decide whether it needed some sort of spread, but I really can't think what I would put on it.  (If I ate pork, a thin slice of Serrano ham rolled in would be great.)  The cheese already gives it a buttery flavor, and there was plenty of date paste to add enough moisture.  I'd have liked it to have had a little more cheese, and a few more walnuts, maybe even up to 1/2 cup.  But over all I was really pleased with how this turned out (other than the shape.  I'd try to find a proper pan for it next time.)

Original recipe:  Soft Cheese and Pepperoni Bread via Brown Eyed Baker

Sunday, February 10, 2019

Morning buns


Apparently these are a new fad that started slowly but is quickly gaining momentum. They were created at Tartine Bakery in San Francisco in the 1970s; I first had one many years ago, but it's been only recently that I've started seeing them more frequently in coffee shops. (I don't think I've ever seen one in a bakery.) I'm not a fan of the super sweet, heavily laden breakfast pastries that are the usual fare in American bakeries, so I was immediately addicted to these lightly sweet, flaky, buttery rolls. (I'd call them a roll, not a bun. After all, they are rolled!) That said, while every one I've had has been very flaky, similar to a croissant, I just found another recipe from Bon Appétit that is made with enriched bread dough, which to me seems more like a cinnamon roll.

I didn't change much in this recipe. I switched out cardamom for the cinnamon (the scent of the cardamom with the orange was otherworldly), water for the orange juice (and used it for proofing the yeast), used less orange peel, and a mix of salted and unsalted butter (adjusting the added salt accordingly.)  I also modified the rising technique as recommended in one of the comments.  Here's what I used:

For the Dough:
3 cups all-purpose flour
1 teaspoon + 2 teaspoons granulated sugar
2¼ teaspoons instant (rapid-rise yeast)
¼ cup orange juice water, very warm

3/8 teaspoon salt
1½ cups butter (half unsalted) cut into ¼-inch-thick slices and chilled
1 cup sour cream, chilled
3 tablespoons ice water
1 egg yolk

For the Filling:
½ cup granulated sugar
½ cup light brown sugar

1 tablespoon
grated zest of one small orange
2 teaspoons ground cinnamon cardamom, freshly ground
1 teaspoon vanilla extract

Proof the yeast in the warm water with 1 teaspoon of sugar.  Combine the flour, 2 teaspoons sugar, and salt in a large zipper-lock bag. Add the butter, seal and shake to evenly coat the butter. Press the air out of the bag and reseal. Roll over the bag several times with a rolling pin, shaking the bag after each roll, until the butter is pressed into large flakes. Transfer the mixture to a large bowl and stir in the yeast mixture, sour cream, ice water, and egg yolk until combined.  Turn the dough onto a floured surface and knead briefly to form a smooth, cohesive ball. Roll the dough into a 20x12-inch rectangle. Starting at the short end, roll the dough into a tight cylinder. Pat the cylinder flat into a 12x4-inch rectangle, wrap in plastic wrap and freeze for 15 minutes.


Line a 12-cup muffin tin with liners and grease with non-stick cooking spray.  In a medium bowl, stir together the sugars, orange zest, cardamom, and vanilla.  Remove the dough from the freezer and place on a lightly floured surface. Roll the dough into a 20x12-inch rectangle and sprinkle evenly with the filling, using more towards one long (outside) edge and less on the other long (inside) edge.  Leave a ½-inch border at the long ends. Lightly press the filling into the dough. Starting at the long end with less filling, roll the dough into a tight cylinder and pinch lightly to seal the seam. Cut the cylinder into 12 equal pieces and transfer cut-side-up to the prepared muffin tin. Cover loosely with plastic wrap and refrigerate for at least 4 hours or up to 24 hours.


Adjust oven rack to middle position and place loaf or cake pan on bottom of oven. Remove plastic from rolls and place in oven. Pour 3 cups boiling water into pan in oven, close oven door, and let buns rise until puffed and doubled in size, 20 to 30 minutes*.  


Remove the rolls from the oven and heat the oven to 425 degrees F. Bake for 5 minutes, then reduce the oven temperature to 325 degrees F.  Bake until the rolls are deep golden brown, **40 to 50 additional minutes. 


Allow the rolls to cool in the muffin tin for 5 minutes, then transfer to a wire rack and remove the liners. The rolls are best served warm, but can be stored in an airtight container at room temperature for up to 2 days.

Make Ahead: After placing the buns in the muffin tin, place the tin in the freezer until the buns are firm, about 30 minutes. Transfer the buns (with the liners) to a zipper-lock bag and freeze for up to 1 month. To finish, return the buns to a muffin tin and refrigerate for at least 8 hours or up to 24 hours, then proceed with rising in the oven as directed.


I had some problems with this recipe.  The first was with the rising.  According to the comments, this recipe is from Cook's Country (subscription required), although the blogger did not credit them.  (She claims she did, but I still don't see it.)  They modified the rising technique so that, instead of placing the rolls in a warm oven (which apparently caused some butter leakage), they put them in a cold oven with a pan of hot water.  My oven has a constant pilot light and so is always a little warm (no more than 100F), but I also used the pan of hot water.  *After 30 minutes, the rolls had hardly puffed at all, which didn't surprise me.  (It might be my yeast, which has been in the freezer for several years.  While it proofs fine in warm water, dough seems to rise more slowly than expected.  It really seems to need the heat.)  I let the rolls rise until they looked puffed and actually doubled, which was an hour and 45 minutes.  (On the other hand, in this demonstration by Claire Saffitz for Bon Appétit, the rolls have risen only about 1 cm after 30 minutes--not much different from mine.  She tests their readiness by the dent test.  I tried that at 30 minutes and the dough sprang right back, but I wasn't sure if it wasn't just sticking to my finger.  Besides, her dough was an entirely different consistency.)  By that time, there was a substantial amount of leakage of the sugar water.

Which brings me to problem #2:  the liners.  I had been counting on using my silicon muffin liners, but despite digging through every box I thought might have kitchen items, I couldn't find them.  The blogger warns that these rolls WILL stick, so I had concerns.  I greased the tins, lined the bottoms with a circle of greased parchment, then wrapped a strip of greased parchment around the side of the rolls and crossed my fingers.  It worked fine--- no sticking.

Since my oven's only heating element is at the bottom, I end up with burned bottoms with items that have a high butter content, so I try to use an air-bake pan in those cases.  To address that here, I put the muffin tin on an air-bake sheet pan (which also helped to catch some of the leakage.)

One problem I did not have was a wet dough, as some people did.  My dough was beautiful--soft and easy to work with.  I can only assume either they put in too much liquid, or, most likely, their butter softened while they were working with it. 

At 40 minutes, the rolls looked done, but I wanted them more caramelized and crispy, so I left them another 5 minutes.  I sort of think that, since butter browns so easily, anything with a high butter content probably needs to get pretty dark before it's actually fully baked.  (I was also concerned about what effect the liquid leakage and the air-bake pan would have on the bottoms, whether they'd be soggy.  Better over baked than under.)  But when I started taking them out of the pan, they seemed too pale and soft on the undersides.  So I put them back in the oven, without the air-bake pan, and baked for another 10 minutes.  I checked the undersides again, and they still seemed too pale and soft.  Back in for another 10 minutes.  **In all, I baked them for about an hour and a half, minus the five minutes or so that they were out of the oven while I was fussing with them.  They turned out perfectly:  crispy and flaky on the outside, very soft and airy on the inside.  (The tips and edges were just starting to get too brown.)  There was a little caramelized sugar at the bottom of each tin that would have cemented the rolls to the tin if I'd let them cool very long in it, but I took them out hot and cooled them on a rack upside down.  (And peeled the paper off before it hardened on as well.)  I'm not even sure it's necessary to do anything more than grease the tins, as long as you remove the rolls soon enough.

Conclusion:  These were absolutely delicious.  They are a bit fussy when you don't know what to look for or expect, but I think once you know that you can whip these up pretty easily.  The reduced amount of orange was still plenty for me--- just a hint.  My only issue is that they are almost too buttery.  I'd probably start with 1 cup of butter next time and see how that works out.  I'm just hoping now that they'll freeze well.

Original recipe:  Morning Buns via Brown Eyed Baker (via Cook's Country)

Saturday, February 2, 2019

Tahinli çörek (Turkish sesame pastries)


I read somewhere that mahlab is good for only something like 6 months. I've had mine for quite some time, but I keep it in the freezer, hoping that will extend its viability. It had a bitter flavor, but one might expect that since it's made from the pit of a type of cherry. I wish I'd tasted it when it was fresh. I wasn't sure it was a pleasant flavor.

These are pretty rich, so I cut the recipe in half and made them the smaller size (3 instead of 2.) I have to admit that one and a half of the pastries was just about the right amount for breakfast to satisfy the taste buds and the tummy, but for health's sake one should probably stick with a single, smaller bun.

Since these are unique, I stuck pretty closely to the original recipe, mostly just adjusting the salt quantity.  Here's what I used to make half the original quantity:

For the dough:
1/2 heaping teaspoon dry yeast
1/6 cup warm water
1/4 teaspoon sugar
2 tablespoons milk
1 tablespoon unsalted butter, melted
1 tablespoon oil
1 heaping tablespoon sugar
1 egg, scrambled and divided
1 -1¼ cup all purpose flour
1/4 teaspoon salt
1 teaspoon mahlep (mahlab)

For the filling:
5 tablespoons tahini (sesame paste)
1/4 cup sugar
1 tablespoon melted, salted butter
1 teaspoon orange flower water
salt to taste (if necessary)
2 teaspoons finely chopped shelled pistachios per pastry (optional)

2 tablespoons orange flower water for coating pastry
raw sesame seeds
sugar (granulated or demarera)

Proof yeast with warm water and sugar. Set aside approximately 10 minutes, until well frothy.  In a mixing bowl, add the milk, butter, oil, and sugar and mix well. While still warm (not hot!), add  half the scrambled egg and the yeast mixture and mix well with a whisk. Sift together 1 cup of flour, salt, and mahlep. Add this to the egg mixture and stir with a wooden spoon until you get a slightly sticky dough. Knead the dough, adding the extra ¼ cup flour if needed. Once you have a nice dough, place it back in a greased bowl, cover, and place in a warm area for approximately 2 hours (until doubled).

Punch down the dough and knead for a minute; divide into 2 or 3 equal pieces. Let the balls rest about 25 to 30 minutes. After 15 minutes, mix together the tahini, sugar, melted butter, and orange flower water.  Mix well, then check to see if you want to add salt. The mixture will be granular. (And for me there seemed to be some sort of chemical reaction which made it become fairly thick and almost gummy.  Weird.)

Once proofed, roll each ball into a disk about 1/8-inch thick. (If making 2, it should measure about 11 or 12 inches; 3 should measure at least 7 inches.  They should be as thin as you can get them while still being manageable.) Divide the tahini mixture evenly for each pastry, approximately 3 tablespoons each. Spread this out very thinly almost to the edges. If you like, sprinkle 2 - 3 tsp of finely chopped pistachios on each one. Roll each round into a tight cigar shape; pinch each end closed. Slowly and gently roll each pastry back and forth with your hands to extend it, starting at the middle. Don't worry if small tears occur. The final strand will be almost as long as from the tip of your fingers to your elbow. Twist the long strand of dough gently over and over again (but don't over twist or you will snap it.) Coil the twisted pastry loosely from the center working outwards and tuck the end underneath. Place the coils on prepared baking sheets (either lightly greased or lined with parchment) several inches apart, leaving room for final rolling.  Preheat oven to 350 F.  Cover pastries with a tea towel and let proof for 30 minutes. (While proofing, the centers might pop up -- that will be fixed with the rolling. There might also be small amounts of oil weeping from the pastry.)

When the rolls are nearly done, beat the remaining egg half in a small dish; arrange in separate bowls the orange flower water, sesame seeds, and some sugar. Flatten each pastry with a rolling pin gently to half its size. Prick it all over with a fork to arrest its rising in the oven. Using a pastry brush, wash the pastries with orange flower water all over, then the egg wash. Sprinkle each pastry generously with sesame seeds and finally with sugar. (It will make a nice crust when baked). Bake pastries for 30 minutes (for the large) or about 20-25 minutes (for the small), or until golden brown.  Watch for over browning the bottoms.


These were more time-consuming than I had anticipated, perhaps mostly because I had to keep checking the directions.  (I've simplified the process here.)  I tried to call up the web page, but it kept diverting to another screen (although I could call it up on the iPhone.  Apparently this redirect is due to a faulty widget, but the original blogger is no longer maintaining his blog, so this won't be remedied.) It helped to check the photographs in the original blog post.

They were probably plenty done at 25 minutes (perhaps could have done less), but since it mentions a brown crust I left them a little longer, but then they were over done. (The bottoms were dark.) And the twists didn’t show up on the outside.


Conclusion:   These were tasty, with an unusual flavor (perhaps the mahlab), fairly crisp on the outside but tender on the inside.  The filling wasn't very noticeable, but I'm sure lent moistness and flavor, though subtle.  They were good despite being a little tough (from extra baking); they just don’t look terribly appetizing.  (They'd look better if they weren't over baked.)  The orange flower water wasn’t very discernible. Perhaps could have done with a tiny bit more salt, but were okay as they were. (I didn’t add any additional salt to the filling.)  I probably would not make this recipe again, but I'd like to try the one at M bakes.

Recipe:  Tahinli via Is That My Buréka?