Showing posts with label cherries. Show all posts

Wednesday, January 18, 2023

No-Knead Fruit and Walnut Bread


I've been wanting to remake this No-Knead Chocolate-Cherry Pecan Bread with a few changes, and I'm finally getting to it.  Mostly it is a matter of the mix-ins--- I didn't care for the chocolate at all, and wanted to try some different fruit instead. 

Then there's the question of how much yeast to use--- I went for more than before (because I did have some issue with the rise) but not as much as they recommend.  (See asterisk.)  King Arthur reduced the water content--- wise move, as the dough was extremely wet previously.  I accidentally reduced the amount of salt because I wasn't paying attention.  I changed up the directions a little and am using a Romertopf clay baker rather than a pie pan.  The changes shown now are deviations from the original King Arthur recipe, but some are also deviations from my previous attempt.  Here's what I used:

 3 2 cups all-purpose flour
1/2 cup rye flour
1/2 1
1/2 cups whole wheat flour
2
1/2 11/2 teaspoons salt
1 1/2 teaspoon instant yeast*
1
1/2 cups cool water
3/4 cup chopped dried tart cherries
1/3 cup golden raisins
2 tablespoons finely diced, candied lemon peel

1/2 cup chocolate chips
1
1/2 cups chopped pecans walnuts, toasted

Sometime the day before (and before it gets too late), mix together the flours, salt, and yeast in a large bowl. Around 7:00 or 8:00 pm, add the water and stir well to make a very soft dough.  Cover the bowl with plastic wrap and let rest at room temperature overnight, or for at least 12 hours.  In the morning, the dough should be bubbly and puffy.

Before and after its overnight rise


If possible, simply add the fruit and nuts to the bowl and mix to combine.  (A heavy-duty electric mixer with the kneading arm might be useful here.)  Otherwise, turn the dough out onto a lightly floured surface.   Roll out slightly and sprinkle on the fruit and nuts.  Roll up tightly, then knead gently a few times to disperse evenly.  Let it rest 15 minutes, then form it into a ball. Place it in a lightly greased bowl, smooth side down.** Cover and let rise at room temperature about 2 hours, until a slight indentation remains when poked with a finger.

During the last 30 minutes of rising, preheat the oven to 450°F and place a bread crock (or a heavy, 4- to 4
1/2-quart oven-safe pot) in the oven while it heats. When the dough has risen, remove the crock from the oven and turn the dough out of the bowl and into the crock; the smooth side will be facing up**. Shake the crock gently to settle the dough, then cover with the lid and return to the oven. Bake the bread for 20 minutes, then remove the lid and continue to bake another 30 to 40 minutes, until the bread is deep brown in color and an instant-read thermometer inserted into the center registers about 205°F. Remove the crock from the oven, turn the bread onto a rack, and cool before slicing.

*There was some confusion about the yeast quantity in the original recipe.  It called for only 1/4 teaspoon (and that's all I originally used, total), but the King Arthur blog post made reference to an additional 1/2 teaspoon to be added to the main dough mixture before the second rise.  They now mention that the yeast quantity has been increased from the original, and it's now all added to the soaker.

**Alternatively, you can line the bowl with parchment, and then transfer the dough, parchment and all, into the crock.  Leaving the smooth side down will produce some interesting crenelations on top that become nicely crusty.


When I mixed the soaker together, it was the consistency of a normal dough.  (Not surprising, since whole wheat flour is more absorbent than AP.)  I should really stop referring to this as a "soaker", as there's no additional flour added later.  (The idea that it should be a shaggy mixture is what messed me up.)  Thinking it was too dry, I added more water until I got something more porridge-like.  Mistake.  It was impossible to handle.  I added more flour as I tried to knead it, but mostly I ended up handling it as little as possible, and then only with silicone mat and spatula.

There was no way I was going to be able to handle the "loaf" after it had risen, which was necessary, since I was using a Romertopf clay baker that had to be pre-heated.  I greased a piece of parchment paper and fitted it into a 10 x 7 x 2.5" casserole, then sprinkled the bottom with corn meal.  I scraped and rolled the dough off the silicone sheet where I'd mixed in the add-ins, plopped it onto the parchment (it filled the casserole completely after rising), covered it loosely, and let it rise for about 2.5 hours.  (I don't know what I was looking for other than a slight indent when poked.)  

I let the clay baker soak for about 15 minutes, then placed it in the cold oven, lid on, to heat along with the oven for about 30 minutes.  I bought the Romertopf used and it probably could have done with a deep cleansing--- it smoked terribly when I removed it from the hot oven and the bottom was black.  (I suppose at some point they become too saturated with grease?) Here's a video of someone showing how he uses a Romertopf baker for a no-knead recipe, just dumping the soft batter in straight from the bowl.

I remember an issue with fruit on the dough surface getting burned, and recommendations to try to cover it.  Last time I tried poking them deeper, but it didn't work very well.  This time I pulled bits of dough over top of the fruit as best I could before transferring the dough to the clay baker.  (Since the dough was so wet, I didn't have a skin on the surface.)

On its way into the oven

I baked the bread as directed.  It didn't get too dark on top, which is fine with me.  Surprisingly, the bottom was very light.  It burned black for some people, and since I have a bottom burner I usually end up with baked goods darker on the bottom.

Conclusion:  It all worked as well as before.  Nice crunchy crust and chewy interior. I think I like it better without the citrus to maintain a sort of "dark" flavor.  The lack of salt was noticeable -- too bad about that error.  Next time, I think I would be able to fit the dough into my smaller clay roaster, which would give the loaf a better shape, not so flat.

Recipe:  No-Knead Chocolate-Cherry Pecan Bread via King Arthur Baking

Thursday, March 24, 2022

Ukrainian cheese-filled buns (3 variations)

 
Ukrainian's eat a variety of stuffed buns as snacks, filled with everything from cabbage, to cheese, meat, and fruit.  I was intrigued by this recipe for a cheese-onion filling because of the photo of layers of buttery dough, but was also interested in one that showed soft buns stuffed with cherries.  Since it appears that every household has its own recipe, I figured I didn't have to be held to any particular one, so I made up my own variations.  

Translating the recipe from the original Ukrainian was interesting -- I think someone has "interfered" with Google's Ukrainian-to-English dictionary, because the results were about as clear as if I'd used a random word generator.  Curiously, translating first into German (or French) and then into English worked almost perfectly.  (This was the case across all pages, not just this recipe.)  Some words, particularly those related to cooking, don't translate well no matter what.  Case in point is the "federation" of green onions.  When you think about it, it makes sense... but I had to think about it.  (Another interesting translation was the nutritional information that showed the amount of "squirrel" per serving; process of elimination indicated that had to be "protein".)  Measuring units or proprietary products particular to a country are always the biggest challenge; in those cases I research as best I can, then ultimately just have to use my best judgement.

These are the unit translations I used:

e    I never did figure out what this was, but logically it seemed to approximate a tablespoon
cube    Assuming this was fresh yeast, I couldn't find a product quantity, so used a standard amount of dry yeast
tl    teaspoon
el   tablespoon
federation    bunch

I had to measure flour by volume because my scale is broken.  Fortunately, the filling recipe and bread recipes in general are fairly forgiving, depending a lot on personal preference.  The biggest problem was not knowing what I was looking for with the bread dough. Initially, I assumed I was kneading to the window-pane point, but then I thought perhaps they don't want all that gluten development, since the recipe called for low-gluten flour. So should the dough remain sticky, more like batter?  Or should I add more flour until it's manageable, but knead only enough to get it smooth? In the end, I kneaded it to the window-pane point, but it was probably not as wet as it should have been since I didn't have any problems with sticking later, even without flouring anything.  The recipe lacked other critical information, like what size pan to use (although it does recommend a "round tepsi") and how long to bake it. (For reference, I put the original Ukrainian -> German -> English translation at the bottom of the page.)

I cut the recipe quantities in half and that is what is below. (I've shown the original quantities and their original units in parentheses.)  Then I split the filling into thirds and left one third with just the onions, one third with onions and spinach, and one third I sweetened and added tart cherries. Here's what I used:

2½ tablespoons warm milk (5 e)
1 teaspoon active dry yeast (½ cube)
½ teaspoon sugar (1 tl)
2 cups type 405 (pastry*) flour (500g)

1½ tablespoons neutral oil (3 el)
¾ teaspoon salt (½ el)
5 ounces warm water (300ml)
100g cow's milk feta cheese (200g)

100g sour cream (200g)
½ bunch (3-4) green onions, cut into small rings (1 federation)

salt to taste
5½ tablespoons unsalted butter, melted (150g)

Prove the yeast in a small bowl with the milk and sugar, then mix it together with the flour, oil, salt, and warm water; knead to form a smooth dough, adjusting flour or water as necessary. Cover the dough and let rise for about an hour. (It will triple in volume.)

For the filling, place the feta in a bowl and mash until smooth. Add the sour cream and onions; mix well and season with salt if necessary, along with any other herbs or spices of choice.

Lightly butter a 10 x 7.5-inch baking tray. Divide the dough in half. On a floured work surface, cut one of the halves into 8 roughly equal pieces and form into balls. Roll each ball out to a 4-inch disc, sprinkling with a little flour if necessary to prevent sticking. Brush each disc (except the last) lightly with the melted butter and stack them on top of each other. (Leave the top piece unbuttered.)  Roll the stack out to a 10 x 7.5-inch rectangle and fit it into the baking tray. Spread the filling evenly over the top almost to the edges (the cheese will burn against the sides of the pan) and brush with a little melted butter. 


Do the same with the second half of the dough as described above and place it on top of the filling. Cover the tray with a cloth and let it rise for about 15 minutes while the oven preheats to 480F (250°C). When the dough has risen slightly, cut it into small squares or diamonds (about 5 cm).  Brush with a few tablespoons of butter and place in the oven, immediately turning it down to 390F (200°C). Bake about 30 minutes, until golden brown.  

Brown the remaining butter (about 2 tablespoons) in a saucepan, then carefully add an equal amount of water (caution:  it foams and sputters!) and a little salt. Brush the browned butter (I strained it because the browned bits were unattractive) evenly over the crust and cover with a cloth and a plastic bag or cling film; leave to stand for at least 10 minutes. (The crust will be quite hard -- this helps to soften it.)  Recut through all layers of the bread.  Serve slightly warm or at room temperature.

*I replaced 5 tablespoons of the AP flour with corn starch. This is a little more than the recommended substitute because my AP flour was already higher in protein than normal.

Spinach option
Defrost and drain about 1 cup of frozen, chopped spinach.  Squeeze as much water out as possible, using a tea towel. You should have about 2 tablespoons. (You can use more or less -- it's really to taste.) Mix into the cheese and onion mixture, then follow the recipe as directed.

Cherry option
Soften about 2 tablespoons of dried, tart cherries in a little warm water; strain out any excess liquid. Add 1 tablespoon of sugar to the
feta and sour cream mixture. (Omit the onions.) Spread the cheese mixture over the dough, then dot evenly with the cherries. Follow the rest of the recipe as directed. Sprinkle cooled pastry with powdered sugar.

Interestingly, the feta-sour cream mixture tasted remarkably like cottage cheese, which is a common bread filling in eastern Europe. I didn't get all the bread layers that others got, but this was never going to be a "flaky," pastry-like bake. However the bread was somewhat tough, and I'm not sure what causes this. I probably had too much flour in the dough, and I'm pretty sure I baked it too long.  (I baked it 35 minutes. The recipe stated until "nicely browned", which I took to mean well browned, but the photos of other bakes show it much lighter.) The wetter the filling, the more the bread softened and the better the buns fared the next day. So on day two, the cheese-onion ones were a bit dry and firm, the spinach ones were a little nicer, and the cherry ones were fine.  (The sugar made the filling much looser, and the cherries were wet.) Also, the sweetness of the cherry-cheese filling balanced the saltiness. The edge pieces were extra firm and had less filling, exacerbated by using a smaller pan; this recipe might be better made in a round pan and cut into wedges so that the edges are shared evenly amongst all pieces.

Conclusion:  I'm pretty pleased at being able to muddle through the recipe and end up with something that was very tasty.  Too salty for my tastes (try 1/2 teaspoon salt), and the bread texture needs improving (or just less time in the oven), but overall a nice snack. There are endless filling variations, even if just adding herbs and spices, like paprika, oregano, or black pepper.

Recipe:  Ukrainian Special "Pi" (пі спеціальний) via Food CORS

Original translation
You also need a rolling pin, a tray with a high edge (a round tepsi is best) and a large tea towel. 

For the dough, heat the milk in a cup in the microwave, but don't let it get too hot. Then stir in the sugar and crumble in the yeast. Leave it all for about 10 minutes. 

Meanwhile, put the flour, oil and salt in a bowl and bring the water to lukewarm. Now put the yeast in the bowl and knead with the water to form a smooth dough. If there is not enough water, simply add a little more, if there is too much, simply knead in a little more flour. Cover this dough and let it rise for about an hour. For the filling, simply cut the spring onions into rings, not too coarsely. In a bowl, add the sour cream and grate or mash the feta cheese over it with your fingers. Mix well and season with salt if the feta cheese wasn't too salty. Divide the dough in half and cut one half into 8 equal parts on a floured work surface and form into round buns with your hands. Roll out these rolls to a diameter of approx. 15 - 20 cm and sprinkle with a little flour, otherwise they will stick. Then brush each flatbread with the melted butter and stack the flatbreads on top of each other. Then roll out this stack to the size of the sheet and place in the greased form. Spread the filling evenly on top and brush with a little butter. Do the same with the second half of the dough as described above and place it on top of the filling. Cover the tray with a cloth and let it rise for about 15 minutes. Preheat the oven to 250°c. When you can see that the volume of the pite has increased a little, cut it into squares or diamonds (approx. 5 cm) with a knife, brush them with a few tablespoons of butter and put them in the oven. However, switch it down to 200°C. When the pite is nicely brown, brown the remaining butter (approx. 4 - 5 tablespoons) in a pan, fill up with the same amount of water (caution: risk of splashing!) and add a little salt. Then spread this mixture evenly over the pite, cover with a cloth and put a plastic bag or some cling film over it and leave to stand for at least 10 minutes. You have to do this so that the pite softens a little as it cools down. Straight out of the oven, the batter is way too hard to enjoy.

Saturday, November 27, 2021

November ABC challenge: Pumpkin Fruit Bread

This month's challenge was pumpkin. There are a LOT of pumpkin recipes out there to choose from, many of which I've saved to make "one day." To add to the fun, I saw this at the checkout stand and made the spontaneous purchase (setting me back $13, I might add. Seriously?) I even marked a few recipes to try.


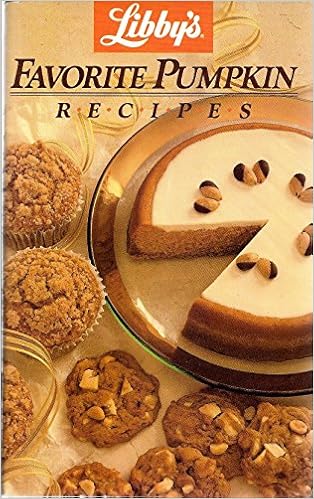
Then I remembered I had this little booklet, at least 20 years old, from the experts themselves...


I looked through that and found this curious recipe for fruit bread made with yeast, yet prepared more like a quick bread.  So many pumpkin recipes are just iterations of the same three or four recipes -- this was completely different, so I wanted to try it.

I cut the original recipe in half, using the ingredients exactly as the original, but I simplified the preparation.  I hesitated about using cardamom because, although I love it, I find it's wasted when paired with any competing flavors.  I should have followed my instinct, as I couldn't detect it in the final product (and I'm not sure it would have been a good pairing anyway.)  The changes shown in the recipe below (in italics and strikeout) are suggestions for future use.

1¼ teaspoons active dry yeast
2 tablespoons warm water
3/4 cup all-purpose flour
1/4 cup whole wheat flour
1/4 cup uncooked rolled oats
1/2 teaspoon ground cardamom ginger or cinnamon
1/4 teaspoon salt
2 tablespoons honey
1/2 cup pumpkin puree
2 tablespoons packed light brown sugar
2 tablespoons orange juice concentrate
3/8 cup (6 tablespoons) chopped dates (and/or cranberries or tart cherries)
3/8 cup golden raisins
3/8 cup walnuts, coarsely chopped

Proof the yeast in the water along with 1/2 teaspoon of the honey (or just use sugar). In the main mixing bowl, combine the flours, oats, spice, and salt; set aside. In a small saucepan, combine the rest of the honey, pumpkin, brown sugar, and orange juice concentrate and heat until very warm, but not hot. (It shouldn’t scald your finger.) Add it to the flour mixture, along with the yeast mixture, and mix well. Add the fruits and the nuts and stir to combine. Spoon into a greased loaf pan. (Original recipe calls for an 8 x 4-inch pan.) Cover and let rise for 30-50 minutes, or until doubled. Bake at 325F for 35-40 minutes (original recipe is 50-60 minutes), or until toothpick comes out clean. Remove from pan and cool on wire rack.  Recommended:  serve toasted with a cream cheese spread.

Since this isn't like anything I've ever made before, I'm not sure if my results were what they were supposed to be, but I suspect they were a little off.  The "dough" was actually a thick batter -- very unusual for a yeast bread -- but since the instructions were to "spoon" it into the pan, I expected that.  With all the moisture and the sugar and the fruit, I'm surprised this rose at all.  It did, barely, but didn't puff up like a yeast dough. It retained every dent and peak as when it started out, and with no skin I certainly couldn't do the finger-dent test to see if it was proofed enough.  As it was, I let it rise well over an hour and hoped for some oven spring, but that didn't happen either.

Since I was using a smaller pan (I used a Wilton 4-ounce round baking pan), I wasn't sure about the baking time, and to be honest, now I can't quite remember how long I let it bake.  I think I checked it around 35 minutes and, although it seemed firm and probably would have passed the toothpick test, it felt so heavy and dense that I put it in for another 5 or so.  (I even rapped on the bottom, but I'm never confident about what a "hollow" bread loaf would sound like.)

The final bread appears to have risen enough, but the texture still seems off.  (By appearance more than feel.)  It looks to me as though the dough was too wet, and I don't like the way the oats leave little dry-looking white marks.  (With all that moisture, I'm surprised they didn't just dissolve into the batter.)  I'm thinking maybe adding the oats to the wet ingredients and letting them soak up some of that moisture might help.  Mostly, though, the flavor needs help; there were too many dull, anti-umami flavors.  Everything was earthy:  the pumpkin, the cardamom, the whole wheat, the raisins, the walnuts, and especially the dates!  (Every time I bake with dates, they get a slightly unpleasant taste to them, almost bitter, even though the dates themselves were fine.)  I would use ginger as the spice, or cinnamon (but only if absolutely necessary) and add some tart fruits.  I'd also chop the dates into smaller pieces, about 1/4 inch, so no bite had too much.  I think this would add a nice contrast to the other earthy flavors.

Toasting this bread made all the difference in the world, and adding the cream cheese spread also really improved it.  I just mixed cream cheese with a tiny bit of orange juice concentrate and some sugar, but here's the suggested recipe in the booklet, halved:

Cream Cheese Pumpkin Spread
8 ounces cream cheese, softened
1/2 cup pumpkin puree
1½ tablespoons powdered sugar
1 teaspoon orange zest


Conclusion:  I enjoyed this, but I'm not sure I'd make it again.  I was disappointed at first, but toasted and eaten with the sweetened cream cheese spread, it was very nice, with a crackly crust and a good bite.  It reminded me a lot of this Chocolate Cherry Pecan Bread.  But I would definitely make changes to the ingredients to brighten up the flavor a bit.  As it's an easy bread to make, it's worth trying again for that experiment alone.  This is not a very sweet bread, so it might also be good with a semi-firm cheese.

Recipe:  Oats 'n Fruit Wheat Bread via Libby's Favorite Pumpkin Recipes